3D flipflops


For quite a while I have been searching for 3D beaded flipflop pattern. When I couldn't find one online, I decided to make my own using right-angle beading.

It was difficult, considering the fact that I am new to the craft. Using 4mm bi-cones and right-angle beading, I had to draw a diagram with each bead I put into it.  The first one I made was a square-shaped flipflop, and I didn't like it all. I ended up, doing it again trying to make it more "shapely".

Here's my bi-cone flipflop, barely 2 inches long.  This is made up of two soles joined together using seedbeads in still in right angle.


I realized the with slight alteration to the diagram I made, seed beads and round beads can also be used for this.

Below are pictures of me starting out on a new sole, and soles waiting for their to be "sewn" over their "pairs"(errr, am not so familiar with beading terminologies).


Presently, I am still figuring out how to draw the pattern (not by hand) I made so I can freely share it with you. 

Have a happy weekend!

P.S.
Have you wondered why I have been posting in large font size? Eye care, bigger font, less eyestrain. =)
Continue reading...

Mobile Phone/Coin Purse


Hello again.

I have been making these purses for a while now.  These had been keeping me busy lately. 


This design was inspired by the crochet blankets that Lola Rose (my brother's mom-in-law who is so good at crochet too!) had been making.  Looking at it more closely, it resembles long and short stitches in embroidery.  Is there a name for this stitch?


I saw this pattern while surfing the net (I think it was on FB).  In fact, it was merely a scanned diagram from a magazine and uploaded on Facebook.  I decided to print it out. To my dismay, the diagram wasn't that clear and it was disappointingly so small that I had to use a magnifying glass just to count exactly how many chains and trebles were there.  I ended up with a diagram, resembling the one I printed out. Try after try (sigh!), i finally got to finish this purse. =)


This purse has a hand-sewn lining and zip.


For sure, I'll be making more of these. Happy crafting, everyone!
Continue reading...

Polymer Clay Donut


My daughter’s birthday falls on this month.  To celebrate it, we made clay donuts for her friends.

I enjoyed making them even without the help of a mold. To get the right color I want for my dough, i had to mix three colors of clay. Faux sprinkles and dessicated coco are also not available in our area, so i had to make them too.  Err, yes quite time consuming!  The easiest is to buy them online. :) 

Beginners (like me) might find this useful.  This was how I made my first donuts.
Mix clay until you find the color you want.  (I mixed a little brown and lots of yellow and white on this one.) 

Form into a small ball. ( Ooops.. sorry for the blurry picture!)


Press it down a bit. Don’t apply too much pressure.


Poke a hole right on the center.  If you don’t have tools yet, you can use the other end of your artist’s brush just as i did.


Donuts aren’t that smooth.  To create texture, use an old but clean toothbrush around your donut.


After brushing it lightly, your donut should look like this.


Take a another color of clay for the frosting.  Form into a small ball and shape into a tiny splatter like this:


You can mix clay with TLS (Translucent Liquid Sculpey) for the frosting if you want.  But as I was making these donuts, i do not have TLS with me.  Yeah, great...  Well, Girl Scouts can always come up with something!


Press the splatter atop and on the sides of your little donut.


Poke, poke, poke.  Right on the center, and check out for frosting smudges on the other side of the hole.


Ta-daaaa! Here’s your donut with the frosting on. ;)

On top


On the side


Bake your little donuts according to package instructions.  Allow to cool after baking. (Note:  Stick headpins on donuts prior to baking, that is, if you wish to make donuts charms.)


Brush the top with glue or gloss, whichever you like.  Take note to brush only those parts you wish to put your sprinkles on.


They should look like this.


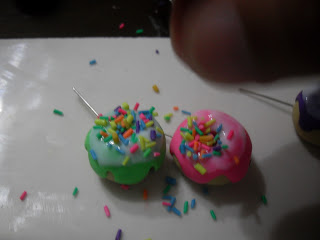
Sprinkle time! Use faux sprinkles, dessicated coco or sugar crystals.


Shake off excess sprinkles.

Move “stray” sprinkle with a headpin, but don’t let your sprinkles look “unnatural".


Gloss all other parts of your “frosting”.  Allow to dry.   
Yey, my donuts are ready!


Here’s my daughter’s birthday donuts. :)


Continue reading...

Followers

Find me on Ravelry
 

Craft Crazy Copyright © 2011